Friday, August 31, 2012

Shortbread

      Today, let's focus on shortbread. Yes, those hellishly delicious biscuits that crumble when you bite them then melt in your mouth. It's a dangerous combination; crumbly and melt-in-your-mouth. It makes shortbread a more-ish disaster for anyone trying to watch his/her waistline. What makes them hellish is that they are so high in fat since they are made with butter, butter, and more butter.
      For the uninitiated who are wondering what the difference between shortbread and shortcake is, here's what Wikipedia has to say: Shortbread is different from shortcake, which can be similar to shortbread, but which can be made using vegetable fat instead of butter and always uses a chemical leavening agent such as baking powder, which gives it a different texture.
      When my husband had to go to the UK for work several months ago, I asked him to buy some shortbread and gingersnaps for me. That sweet man bought back 3 packs of each. I scoffed a pack of the shortbread in 2 days and had to keep the rest in my cellar.
Just a supermarket house-brand, but these are good anyway

       Last night, I opened the last pack of shortbread. I ungracefully took two pieces out of the packet, put them on a piece of tissue to catch the crumbs and plopped my bum on the sofa to savour the buttery delight. Then I went back for another 2 pieces, enjoyed them, and felt guilty. Oh well.
   
This all reminded me of when I baked shortbread earlier in the year. They turned out alright, but I learned a lesson from that baking experience. That is why I am posting this recipe with my two-cents' worth, so that you can learn from my mistake.
     The mistake I made was to use cheap butter for the shortbread. I had only been in the Netherlands for a few months then and was just learning to familiarise myself with certain words. What I didn't realise was that the 'butter' I bought was made with a percentage of vegetable oil. So while my shortbread tasted nice on the first day that they were baked, they tasted a little stale the next day. There was no fault with the recipe, only with my ingredient. Some of my biscuits also turned out over baked because they were not all of the same thickness. But I shall share a picture of them anyway.

     So people, use real good-quality unsalted butter to make shortbread. Anything less than that and you're just wasting your time. Try to make your unbaked shortbread of even thickness and size, and watch them while they bake.
   
     In the recipe provided here, you will see that cornflour is used. Some people use cornflour or rice flour in shortbread to give a lighter and more crumbly texture. I can say that this is a good idea and it works. Give it a try. And remember, use good butter!

http://britishfood.about.com/od/scottishregionalrecipes/r/Shortbread.htm


Saturday, August 25, 2012

Chicken Jalfrezi for two

     I cook dinner on most days. Some days I just can't think of what to cook and some days I just don't want to cook. I have gotten better in cooking over the past year. My repertoire of food that I cook well include a variety of dishes now. I have become adept at cooking for two. So here's an easy, healthy curry that feeds two:

Chicken Jalfrezi
serves 2
 Approx 270kcals per portion without oil

200g chicken breast, diced
1/4 tsp cayenne pepper/chilli powder
1 tsp ground turmeric
1/4 tsp salt

1 tsp ground ginger
1 1/2 tsp ground cumin
1 1/2 tsp ground coriander seeds
1/2 tsp garam masala
1/4 tsp cayenne pepper/chilli powder (or more if you like)

1 TBSP vegetable oil (or cooking spray)
1/2 cup onion, chopped
2 cloves garlic, minced
300g tomatoes, chopped (fresh or canned)
1 cup green capsicum, diced
1/4 cup water
salt, as required
1 tsp butter
1 tsp lemon juice

1. Combine the first 4 ingredients in a bowl and stir well to coat the chicken. Marinate for at least 15 minutes.
2. Combine the next 5 ingredients (the spices) in a small bowl/dish.
3. Heat the oil in a skillet over medium heat. Add the onions and stir. After 2 minutes, add the minced garlic.
4. Cook the onions and garlic until softened, about 4 minutes. Don't let the garlic burn!
5. Add the marinated chicken to the pan and cook until lightly browned.
6. Now add the tomatoes and spices and cook for 5 minutes.


7. Add 1/8 cup of water to the pan, bring the pan to the boil, then cover and reduce the heat to low.
8. After 10 minutes, check on the curry and add more water if it looks too dry.


9. Add the capsicum to the pan then cover and leave to cook for a further 10 minutes.
10. Lift the lid and savour the aroma of your curry. Give it a taste taste and add some salt if required.
11. Turn off the heat then stir in the butter and lemon juice.


Serve with rice, naan, chapati or whatever floats your boat!


Friday, August 24, 2012

Dangerous Cocoa Fudge Brownies

    I have never been known for being lady-like or for having anything less than a potty mouth on me. So I shall go ahead and exclaim in the most unladylike manner: "I did it! I f***ing did it!" The 'it' that I am referring to is my quest to make a fudge brownie using only cocoa powder and no actual chocolate. A search on the Internet will show you that most fudge brownie recipes use semisweet/dark chocolate for the texture and flavour.

Made using ingredients you probably already have at home

      This is the first time that I have baked two brownies in one week. Surprisingly I have not received any complaints from my husband, who does not have a very sweet tooth. Having said that, he liked the previous brownies so much that he had 3 pieces in one night. As for this brownie, we had 2 pieces each. He liked those brownies better because he "likes frosting on his brownie". Pfft! What does he know!! Anyway, it should not be any wonder if both of us gain a few kilos in the next month.
     
       I woke up early one morning and was still thinking of finding the perfect recipe for fudgy brownies. I told the husband that I could try a recipe I've just seen but maybe he doesn't want more brownies in the house? No. He said "Go for it!" So I did, and I am glad for it.
      I think that I am entitled to changing the name of this recipe because I made alterations to it. I hardly ever follow recipes to the T. I have chosen to name this 'dangerous' because they really are. These brownies have a shiny, sticky skin and definitely leave no room for arguments about whether it is a cake or a brownie. They are soft, chewy and dense. They are perfect!
      
     The original recipe can be found here. Like I said, I altered the recipe. It was mostly because I had to, not so much that I wanted to make changes to the recipe. I did not have enough butter and cocoa powder at home so I improvised with the margarine I use on my bread. Please use the full quantity of butter of you have it at home. My recipe is as follows:

Dangerous Cocoa Fudge Brownies
makes 12 pieces (or more if you cut them smaller)

140g unsalted butter/margarine 
*(I used 110g butter and 40g Becel Light Margarine)
1 cup plus 1 TBSP caster sugar (approx. 215g)
(add another TBSP if you like sweeter brownies)
3/4 cup unsweetened cocoa powder (approx. 89g)
1 tsp instant espresso powder
1/4 tsp salt
1/4 tsp baking powder
1/2 tsp vanilla extract
2 large eggs, cold
1/2 cup plain flour, sifted (66g)

1. Preheat oven to 170°C. Grease and line a 8x8inch (or slightly smaller) square baking pan with baking paper or foil, leaving some overhang on the sides.
2. Heat some water in a small pot till simmering. Combine sifted flour and baking powder.
3. Put the butter, sugar and cocoa powder in a heatproof bowl. Put the bowl over the pot of simmering water (bain marie) and stir the contents periodically with a spoon until melted together smoothly. 
4. Take the bowl off the heat and in the espresso powder and vanilla. 
5. Put aside to cool until you can dip your little finger into the mixture for 2 seconds without burning it.

6. Now add one egg into the mixture and stir until well mixed. Repeat with the second egg.
7. Using a rubber spatula, fold in the flour in 3 batches until your mixture is smooth.
* I refused to whisk or beat the mixture at any point because I wanted as little air in it as possible.
8. Pour the mixture evenly into the baking pan and put into preheated oven.
9. Bake 20 to 25 minutes, until a toothpick inserted in the centre comes out with a little batter clinging to it. This took 20 minutes for me. 
10. Leave to cool in the pan for 15 minutes then lift the brownie out by the overhang and put in the fridge to chill. When cold, cut into pieces.

You don't want the edges to be hard or burnt so watch the oven carefully. The brownie should look shiny and not be wobbly when you shake the pan.


Voila!

Wednesday, August 22, 2012

Bake-easy

     If you find it a hassle to grease baking pans, cupcake cases or anything at all, you might want to look for this product: Wilton Bake Easy spray
     I've been greasing baking pans with cooking spray for some time, but since using the Bake Easy spray I have hardly had trouble getting anything out of the baking pan. Most of the time it's just a matter of running a knife along the edges of the cake/brownie to loosen the edges then inverting the pan with a shake or sharp tap to get my yummy creation out.
      It is not expensive and I highly recommend it for anyone who bakes more than just occasionally.


      I even use it for yorkshire puddings these days. I know that purists will be cursing at me now for using baking spray for yorkshire puddings, but my yorkies are as good as they've always been and I haven't received any complaints from my British husband. Hey, why knock it if it works?!

Tuesday, August 21, 2012

Cocoa Brownies

      These were supposed to be fudgy. However they didn't turn out as fudgy as I would like so they don't satisfy my requirements to be called a fudge brownie. They are decent brownies, though, and are great if you like a dense but cake-like brownie.


Dense but not fudge-like. Still good though.

        The reason that I chose to try this recipe instead of any other was because this recipe uses only cocoa powder and was called 'the perfect fudge brownie'. My usual brownie recipe uses semisweet chocolate and is close to being fudge-like so I was intrigued that using only cocoa powder could result in a fudge-like brownie as pictured in the website I got the recipe from. Here is the picture as shown on the website:

Very different from my results huh?

      I cannot understand how I got such drastically different results from the author of the recipe. I followed the recipe, only omitting the nuts, and altered some things in the frosting. Like I said, the brownies were decent and after getting some feedback from the people who tasted the brownies (who said it was a little too sweet), here is an altered recipe


Cocoa 'fudge' Brownies
makes 12 servings

1/2 cup butter/margarine (115g)
1 cup sugar (225g)
1 tsp vanilla extract
2 eggs (large)
1/2 cup plain flour (63g)
1/3 cup + 1 TBSP cocoa powder (approx. 48g)
1/4 tsp baking powder
1/4 tsp salt

Frosting
makes enough to cover the brownie

100g confectioner's sugar (0.8 cup)
2 TBSP cocoa powder
30g butter/margarine
1 tsp vanilla extract
1 TBSP milk

1. Preheat oven to 175°C. Grease and line a 8x8inch baking pan.
2. Sift flour, baking powder, salt and cocoa powder together in a bowl
3. In a separate bowl, stir softened butter and sugar together with a spoon for about one minute.
3. Add the vanilla essence and beat. 
4. Add eggs one at a time, beating after each addition
5. Add the flour mixture to the butter mixture in 3 batches. Fold in and stir well after each addition.
*Don't whisk the batter because you don't want to incorporate air into it.
7. Pour batter evenly into the prepared pan and bake for about 25 minutes, until the edges just begin to pull away from the pan.
This is important because you don't want to overbake the brownies.
8. Take the pan out of the oven and leave to cool. Don't remove the brownie from the pan yet!
While the brownie is cooling, prepare the frosting.


Frosting:
 1. Sift the confectioner's sugar and cocoa powder together in a bowl
2. Melt the butter in a separate bowl and mix the vanilla essence into it.
3. Slowly whisk in the cocoa/sugar mixture into the butter. I say 'slowly' because confectioner's sugar tends to fly everywhere if you are not careful!
4. You want to get a spreadable consistency that is a bit thicker than chocolate syrup.
5. If the mixture is a little too thick, add milk by half-tablespoons and whisk till you get the right consistency.

Your brownie should be part-cooled by now so it should be firm enough to handle. Carefully remove the brownie from the baking pan and onto a plate. Spread the frosting onto the brownie and put the plate in the fridge for at least 3 hours.

I know that it sucks to have to wait 3 hours. But it is worth waiting to have the brownies cold, after the flavours have had time to blend together.

PERSONAL NOTE: Try adding some instant coffee powder (dissolved in a small amount of hot milk) or mint essence to the frosting for a different flavour!

In search of the perfect fudge brownies

      I remember seeing a few Mrs Fields stalls in Orchard Road in Singapore when I was in my mid-teens. By the time I turned 20, there weren't any of those stalls left. That was such a shame because I have awesome memories of buying 'brownie nibbles' from Mrs Fields, which were an assortment of small squares of brownies. I would always choose the chocolate chip and the macadamia varieties. They were perfect- dense beyond belief, fudge-like with a crackly top and just amazing. More than 5 years on, I miss these brownies so much that I am looking for a recipe that best replicates them.

Look at that dense, fudgy texture!

      I searched under different search-terms: dense brownie, fudge brownie, ultimate brownie.....
There were many recipes. So I tried one today in the hopes that I would get something like this:

Photo credit to Lisaiscooking.blogspot.nl

      But that was not to be. What I got was a dense but cake-like brownie. Nevertheless, it's a decent recipe so look for it in the next post.

Thursday, August 16, 2012

Cheese

     Do you love cheese? I do. However, not all cheeses are created equal. Some have pungent aromas and flavors that are too strong (or complex) for me to appreciate.
     Having spent time living in the UK and presently in Europe, I've had no shortage of cheeses to try. I like some European cheeses and some British cheeses. I recently acquired a taste for Brie (though I must have it warmed) and Wensleydale cheese with cranberries. If you haven't tried the Wensleydale, you're missing out on something heavenly! I never thought I would eat a cheese and think "I could have that for dessert. Just that cheese, nothing else".

Add caption
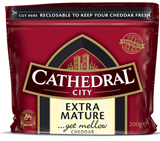
     What I find myself always going back to is good ol' Cheddar.  There's enough variety of strengths that you can get cheddar in, and that makes it a versatile cheese to have at home. It works in sandwiches, sauces, salads, pasta and even soup.
     I find that having a strong cheddar in the house ensures that I have a cheese that works for anything. I don't bother with mild cheddar. I go for mature or extra mature. Vintage cheddar is too much for me. It is easy for me to get Cathedral City brand extra mature cheddar in the Netherlands, where I live.

     I don't always have cheddar in the house. I do buy other cheeses. With only my husband and I living in the house, I can't buy too many cheeses at any one time because there is only so much cheese we can eat. And to be honest, I mostly use cheese as an ingredient in cooking instead of a sandwich filling.
    When we first came to Netherlands a year ago, I had no idea what cheese I was buying. Sure, the names are printed on the packages. But the names meant nothing to me because I didn't know what type of cheese they were. I developed a strategy to buying cheese: give it the 'squeeze test'. If it is too soft, don't buy it. If it is hard like a brick, don't buy it. Anything in between is fine. That worked well for me until my husband told me that he hated the cheese I was putting in his sandwiches. So we went back to cheddar.
    Talking to a neighbour, I was educated on the strengths of cheese sold here. "Jong" for young cheese (duhhh!), "Belegen" for mature cheese, "Extra belegen" for extra mature cheese, "Boerenkass" for farmer's cheese etc. That made things so much easier for me. I've now found a cheese we both like. And it is available in a lower-fat version as well!
    Maaslander. It's a brand of Gouda cheese. It is made with 25% less salt than other Gouda cheeses but it does not lack flavor. It has the right strength and texture to make it suitable for most things. It also melts well! So with this, I end my cheese rant.


Wednesday, August 15, 2012

Dark Orange DBB

Dark orange DBB? "What on Earth is that?!" I can hear you asking. It's a shortened name for a very sinful, delicious, scrummy, rich brownie. DBB stands for: death by brownie....


You know you want it...

It's a chocolate brownie flavored with orange rind. When I first made it, I swore I would never share the recipe. But here I am...sharing it....

The recipe is easy. Just add the ingredients gradually while beating, pour into a pan and bake.


Dark Orange DBB
makes 8 to 10 servings

220g butter/margarine
175g caster sugar
4 large eggs
1 tsp grated orange rind
50g cocoa powder (unsweetened)
175g self-raising flour

Icing
55g dark chocolate
30g butter margarine
¼ cup confectioner’s sugar (icing sugar)
½ tsp grated orange rind
orange juice, as needed

1. Preheat oven to 175°C. Grease and line a 9-inch round cake pan.
2.    Cream butter and sugar until light and fluffy (a few minutes)
3.    Add eggs into butter-sugar mixture, one at a time, while beating
4.    Slowly add the cocoa powder (it can get all over your face!) and beat to combine. Add orange rind.
5.    Add flour until well-mixed
6.    Pour batter evenly into cake pan and bake 45-60 minutes, until a knife inserted in the centre comes out almost clean.
7.    Cool in the pan for 10 minutes then turn out onto a wire rack to finish cooling

*Because this recipe calls for quite a bit of continuous beating of the batter, you might be happier to use an electric mixer. I hardly use mine because I’d rather beat the mixture by hand than wash up all the parts of the electric mixer!

To make the icing:
1.    Melt the chocolate and margarine together in a bowl set over a pan of simmering water
2.    Add the orange rind then the confectioner’s sugar and stir
3.    The icing should be of a spreadable consistency, but not runny.
4.    Add enough orange juice to get it to the suitable consistency. If it is too runny, add more confectioner's sugar
5.    Spread on the cooled brownie and refrigerate. The icing will harden upon refrigeration.


Gnocchi from scratch


      I was showing my husband a vegetarian recipe book a week ago and pointed out a recipe that used gnocchi. He asked me what 'gnocchi' is and I told him it's a pasta made from potatoes and that I've tried it but didn't like it. 
That got me started on looking for a decent recipe for gnocchi. I found many. Some had egg added, some didn't. Apparently, traditional Italian grandmothers would make it without egg. After reading this, I decided to try making gnocchi without eggs.
      It was easy enough, but I won't hide the fact that it is quite time consuming. It is something that is probably best made on a weekend, in a double batch or more, and frozen for convenience. I simplified the method and the shaping process. The gnocchi turned out firm, with a nice bite and did not taste weird. Whether they turned out 'authentic' or not, I wouldn't know because it is not something I have eaten enough to compare. But it works for everyday Jills and Joes who just want decent homecooked meals.

So, here is my simplified recipe for gnocchi:
Serves 4 (I froze half the batch)

350g potatoes, peeled & washed
150 -170g plain flour (possibly more for flouring)
Salt & pepper

Two baking trays and baking paper

• Cut potatoes into chunks and put in a pot. Cover with cold water bring to a boil. Boiling them in cold water gives a better texture. Boil till potatoes just break apart when you put a fork through them.
• Drain and mash the potatoes as smoothly as you can. You don't want any noticeable lumps. NO MILK/BUTTER!
• Leave the mashed potatoes to cool to room temperature.
• Measure your flour in a bowl and prepare your work surface. 
• When mashed potatoes are cool, slowly add flour and mix with a spoon. You want a soft dough that is very slightly sticky. You will probably have to use your hands to mix the dough towards the end.
   * I was lazy and mixed the flour into the pot of mashed potatoes instead of using a bowl
• Now that you have your dough ready, it is time to flour your hands and your work surface.
• This is the fun part: Divide the dough into eighths and roll each portion on your floured surface until you get snake-like logs. Each log should be about 1.5cm thick (thinner if you want tiny gnocchi)
• Now use a non-serrated knife (butter knife is good) to cut pieces off the logs of dough. Each piece should be about 1.5cm wide.
• Use the knife to make a 'cross' or 'plus' design on each piece. You can skip this step. The grooves are supposed to help the gnocchi hold some sauce. This obviously isn't the traditional gnocchi shape. I tried doing that with a fork and became frustrated! This way is easier!

• The gnocchi is now ready to be boiled! (For freezing directions, scroll down) 
• Put a pot of water on the stove and bring to a boil. Drop the gnocchi, in batches unless you have a wide pot,  into the simmering water. The gnocchi should float to the surface after a few minutes. Leave them to cook for about 2 extra minutes after they float. Then remove them from the water with a slotted spoon and continue with the rest.
•Toss in a simple pasta sauce. Remember, I said 'toss' not 'drown'! Pictured here is a tomato, mushroom, sausage and rocket sauce. 


• FREEZE: Put half of your gnocchi on a tray covered with floured baking paper. Arrange the gnocchi in a single layer and put the tray in the freezer. Once the gnocchi are frozen, you can transfer them to a ziplock bag and freeze for up to 6 weeks.
• MAKE AHEAD: You can make this ahead up to a few hours before cooking. But beware, the gnocchi could get stuck on the tray. Place the gnocchi in a single layer on a very well floured tray and put the tray in the fridge until you are ready to cook. By the way, I don't particularly recommend doing this.

Sunday roast made easy

Roast dinner made easy with cubed potatoes done in a Tefal ActiFry machine. The yorkshire puddings are homemade though!